

A few months ago I got hooked on making Peyote stitch triangles. I spent time playing around with the basic shape and found the repetition of the stitch relaxing but enjoyed being able to alter the results depending on the bead finish and their placement in the triangle. I also wrote a tutorial at that time on how to make a pair of Peyote triangle earrings.
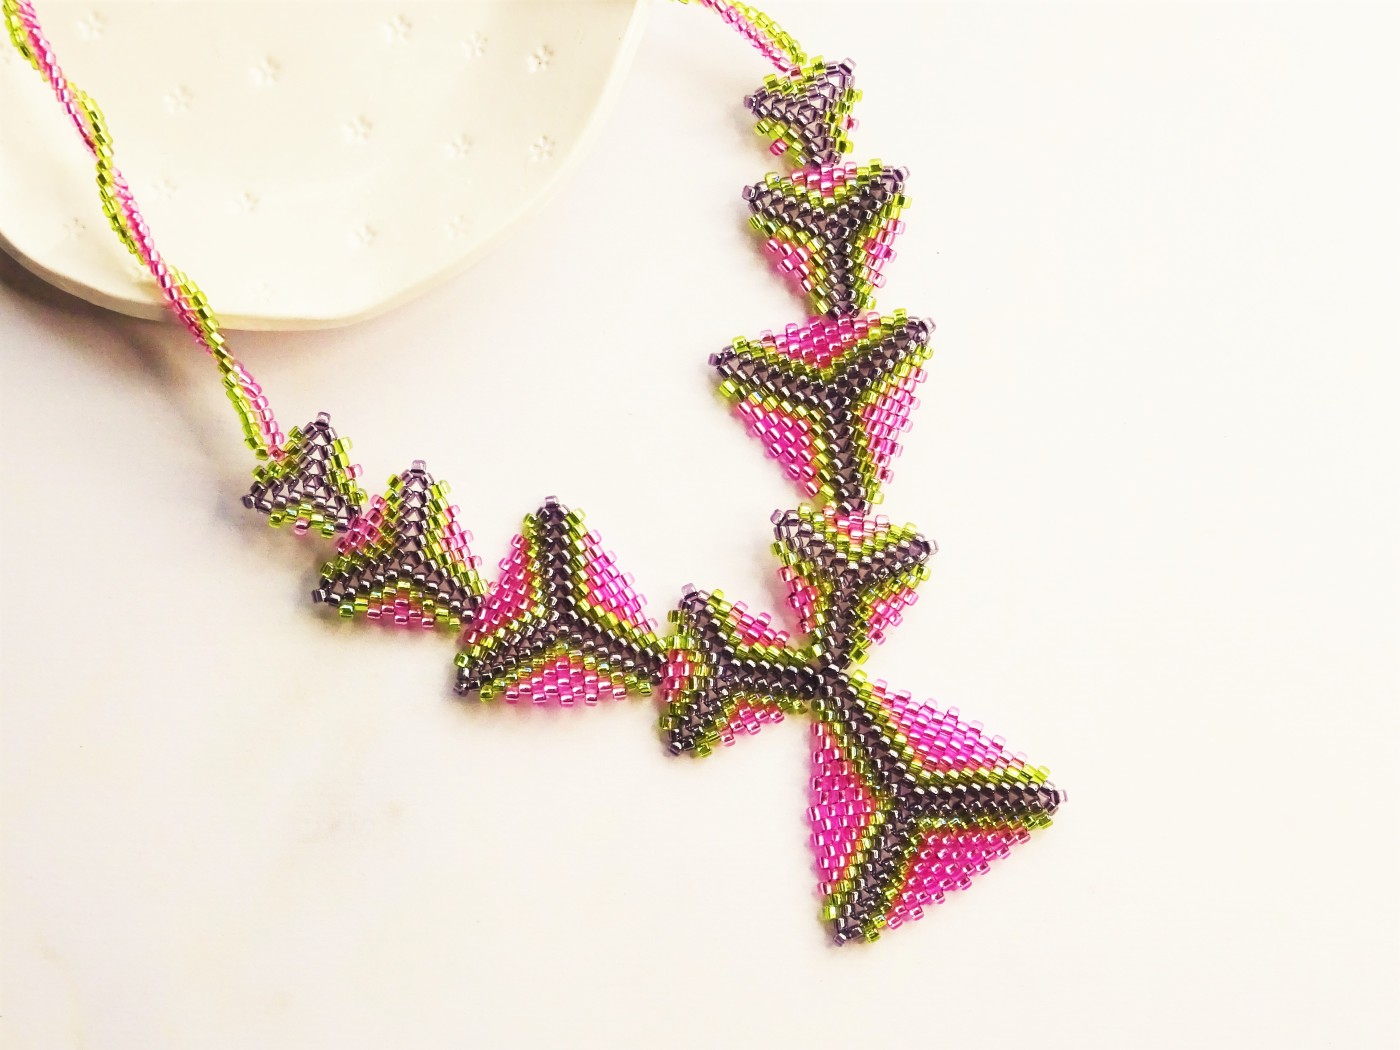
After posting the earring tutorial I decided I wanted to continue with the Peyote triangle and construct them into a necklace. I made triangles of various sizes, following the pattern from the earring tutorial, and then there they sat whilst I got distracted with other things (namely a burst water pipe and resulting in no water for days and a whole lot of mess and stress whilst it got fixed). I finally got round this week to carrying on from where I left off and my Peyote stitch triangle with twisted rope necklace was created. I love this bold necklace – it has a look of the 80’s about it because of the shine those lovely silver lined seed beads give off with the pattern and structure and the two strand twisted rope means that the triangles are the main focus.
I could go on but I won’t as you are here for the tutorial. This has all been done using silver lined size 11 seed beads so nothing too fancy. Play around with bead colours and different finishes to see how different it could look. You will also need beading thread and a beading needle.
A YouTube video for this tutorial is at the bottom of this post.
How To Make A Peyote Stitch Triangle Necklace
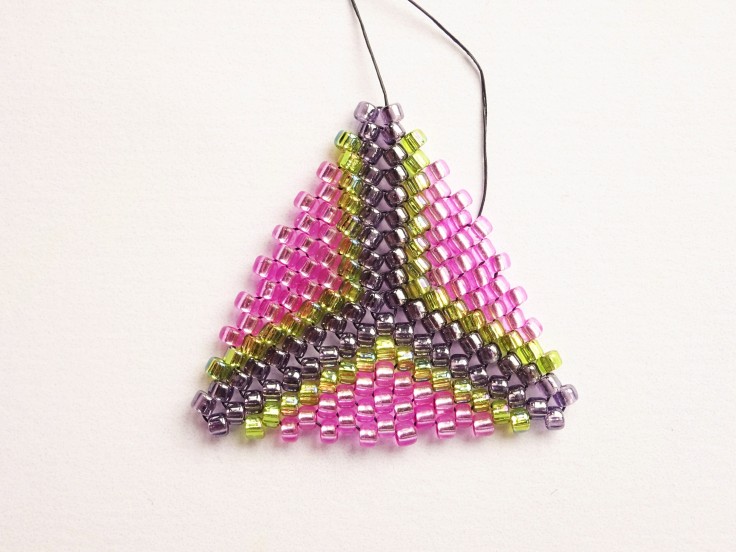
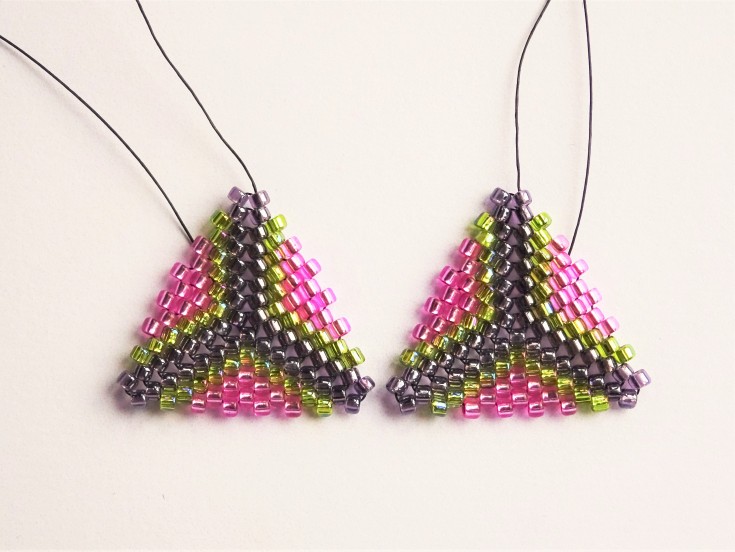


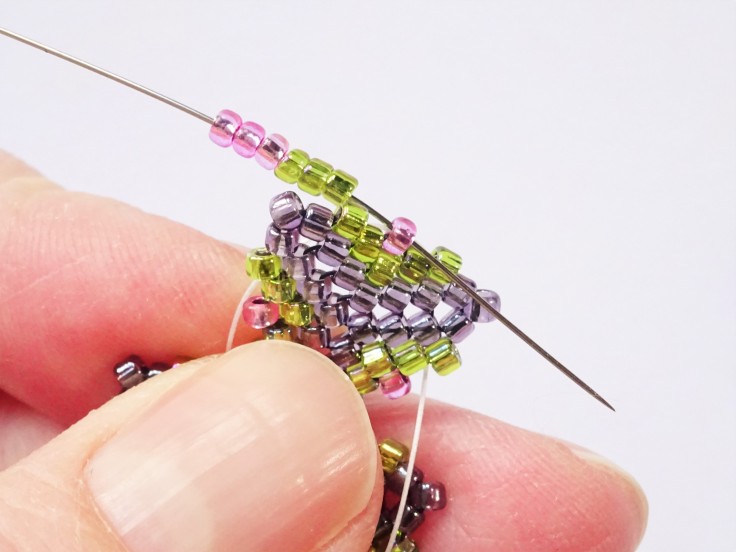
- I am jumping in here with the basic Peyote triangles already started. See my Peyote earring tutorial for this basic pattern. As you can see there are 4 different sizes – there is one large triangle for the centre pendant with equal numbers of the other sizes for each side of the necklace. I have left long tail threads on each triangle and I haven’t knotted any threads yet as we are going to add to them.

2. Pick up the smallest triangle and add another, final round of beads. The tail thread should be exiting out of one of the triangle points, so begin here by picking up a pink bead and then continue on all around the triangle but on the other two triangle points add purple beads (the triangle will have two points with purple beads and one point with a pink bead).

3. With the needle exiting out the pink triangle point, slot the pink bead in between the two pink beads on the outer edge of the second smallest triangle, then take the needle through the next pink bead along.


4. Peyote around the triangle making sure to add a pink bead at the triangle point and take the needle into the pink bead from the smaller triangle to secure it in place. If needs be switch to a tail thread from the larger triangle.

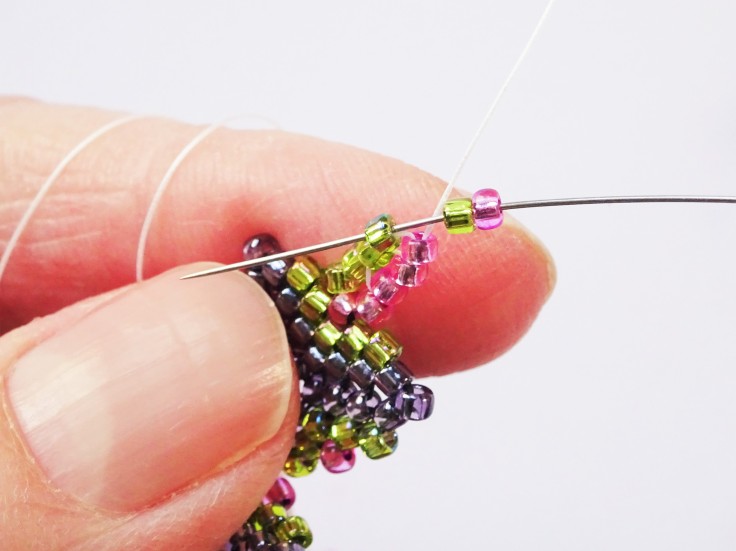
5. Move the needle and thread around the triangle so that it exits out of the pink bead at the triangle point. Pick up the second largest peyote triangle and take the needle into the last pink bead on this bigger triangle.

6. Peyote around this triangle as you have in all the other steps adding a pink bead at the outer point.


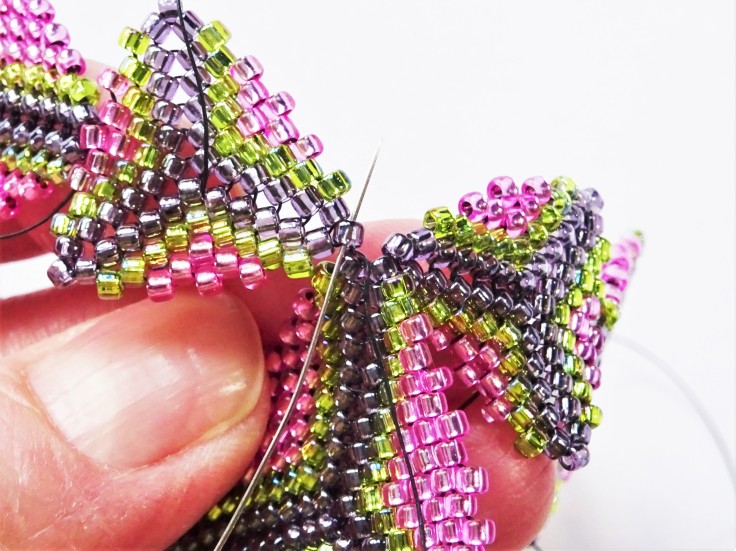
7. Move the thread so that it exits out of the bottom pink bead and take it into the last pink bead on another second smallest triangle. Peyote around this new triangle making sure to include the bead from the previous triangle to secure in place. On this triangle add a purple bead to every triangle point.

8. Move the needle and thread so they exit out of the grey point and pick up the largest triangle. Take the needle down into one of the grey beads at the top of the large triangle.

9. Continue to peyote around the larger triangle.

10. Repeat steps 1-9 for the second necklace side.


11. Once the second side is finished, take the needle and thread so they exit out the top grey bead on the largest triangle and then up into the grey point on the nearby smaller triangle. Take the needle across and down into the next grey point and take the needle and thread down into the larger triangle.

12. Weave in and knot all the tail threads. Cut off any excess threads.
How To Bead A Two Strand Twisted Rope
We are finishing off this necklace with a two strand twisted rope but I’ve put it here as it’s own heading as it’s a lovely technique.

- Cut a generous arm span length of thread and add a beading needle to one end. I have switched to white thread here as I am only using the green and pink beads and the thread is going to be seen. Take the needle through the middle pink bead on the smallest outer triangle. Leave a good tail thread.

2. Pick up 3 pink beads and 3 green beads. Take the needle through the original pink bead and pull to form a beaded loop.

3. Take the needle back up the 3 pink beads. This should start to pull the beads to stand side by side.

4. Pick up 1 pink bead and one green bead and take the needle down into the top green bead on the necklace. Pull the thread all the way through and the pink bead should sit on top of the lower pink beads and the green should sit on the other green beads.

5. Take the needle down and across and up through 3 pink beads. This seems like a very odd step but it will cause the beads to form the twist. The thread will be a little visible so choose the thread colour carefully!

6. Continue on with steps 4 and 5 until your rope measure 5 and 1/4″ long (this should make an 18″ necklace in the end. If you want a longer or shorter necklace then alter accordingly)
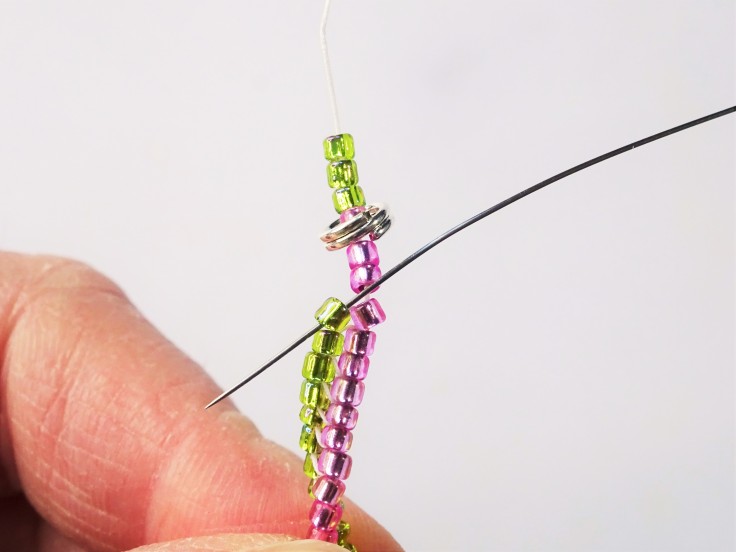

7. Exiting out of the pink beads, pick up 3 pink and 3 green beads and a split ring. Take the needle down into the green beads on the twisted rope to form a loop. Weave in the remaining thread, knotting as you go and cut off any excess thread.

8. Add a needle to the tail thread left at the start of the two strand rope and take in up into the green beads. Weave in this thread, knotting as you go and cut off the remaining thread.

9. Repeat steps 1-8 for the two strand rope on the other side and add your clasp.

This is definitely a project to work on over a few days but the satisfaction of seeing it grow is so worth it.
If you would like any guidance on how to knot your threads then I detail how to at the bottom on my easy beaded bezel tutorial.
I have plenty of other bead weaving tutorials to get stuck into if you have enjoyed this one. Don’t forget to subscribe or sign up for my newsletter before you go.
Until next week…
Hannah


Oh my goodness. This is really nice work .
Thank you. I’ve considered making another in a different colour scheme (purely for fun to see how different it would look) but I think my fingers could do with a rest before starting again! 😂